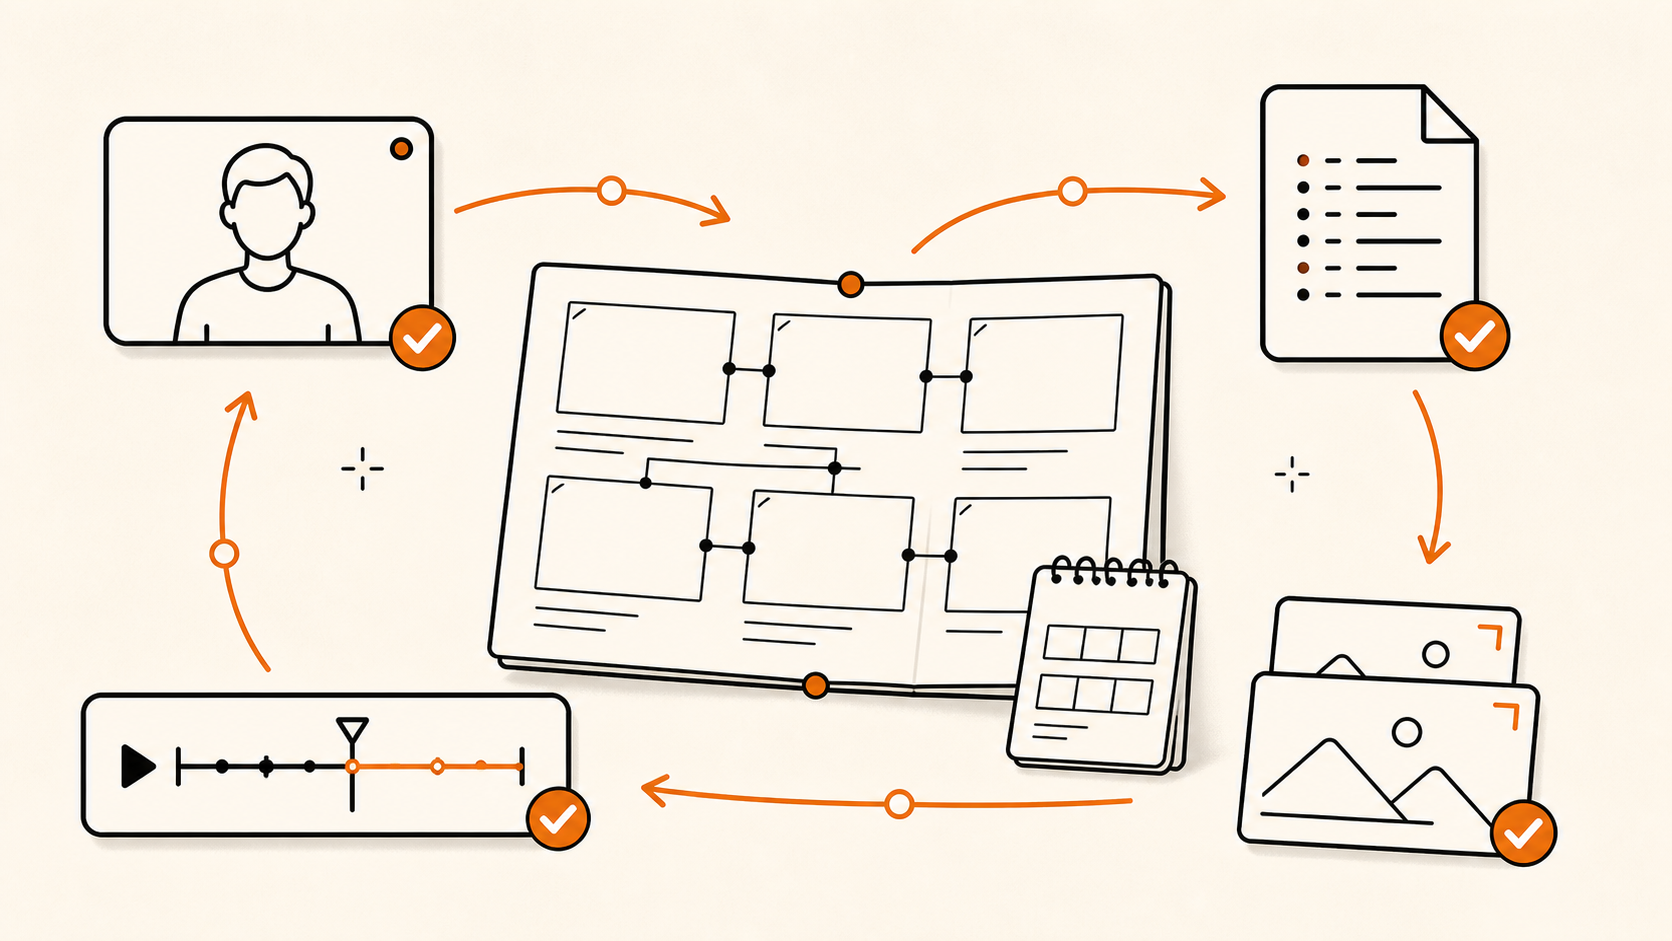
B-roll talking head tidak harus dimulai dari video AI. Workflow ini dimulai dari video utama, transcript dengan timestamp presisi milidetik dari Gemini, still image 9:16 untuk setiap visual beat, lalu image-to-video motion di Google Flow.
Contoh ini memakai video tentang Hermes, OpenClaw, Obsidian, VPS, Mac mini, dan komputer. Still image dibuat sebagai end frame yang siap dianimasikan, lalu clip motion dipasang kembali sebagai B-roll di timeline talking head.
1. Mulai dari video talking head
Rekam video utama lebih dulu. Audio dan timing video menjadi source of truth untuk seluruh visual.
2. Minta Gemini membuat transcript dan timestamp
Upload video utama ke Gemini. Timestamp ini menjadi perkiraan durasi tiap B-roll supaya generation tidak kepanjangan atau kependekan dan credit Google tetap hemat. Durasi final tetap bisa dipotong manual di editor.
Prompt Gemini untuk transkrip · textTranskrip video ini verbatim dalam Bahasa Indonesia. Pecah berdasarkan beat kalimat dan sertakan timestamp presisi milidetik dengan format [HH:MM:SS.mmm - HH:MM:SS.mmm]. Sertakan durasi tiap beat, speaker jika lebih dari satu, dan tandai bagian yang timestamp-nya hanya perkiraan. Jangan mengklaim presisi microsecond atau frame accuracy jika source video/provider tidak menyediakannya.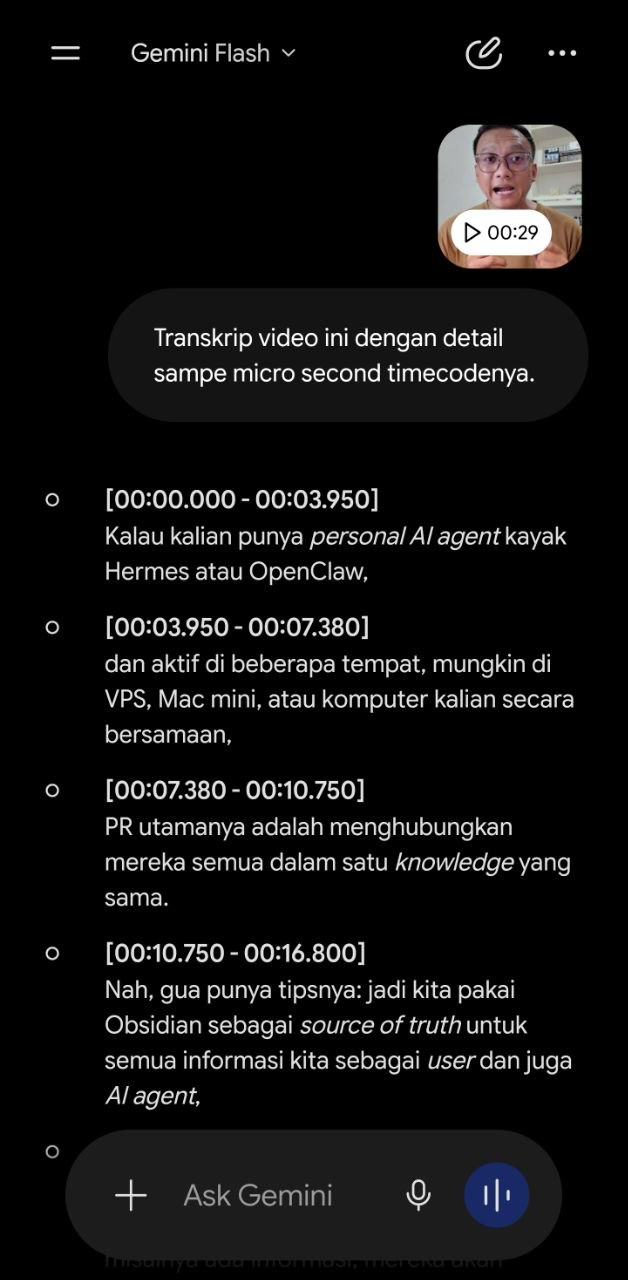
Step 2 — video talking head di-upload ke Gemini, lalu ditranskrip dengan timestamp presisi. 3. Ubah transkrip menjadi visual beats
Satu beat memuat satu ide visual. Pertahankan timestamp asli sebagai perkiraan durasi agar generation tidak boros credit; durasi final tetap dipotong manual di editor.
Prompt storyboard visual · textPecah transcript berikut menjadi visual beats untuk B-roll talking head 9:16. Tempel hasil transcript Step 2 pada bagian [TRANSCRIPT DI SINI]. Untuk setiap beat, tulis: timecode asli, durasi perkiraan, inti kalimat, satu metafora visual, objek wajib, arah gerak, area aman subtitle 20–25 persen bagian bawah, start frame, end frame, dan risiko continuity. Jangan membuat visual dashboard generik dan jangan mengubah timecode. Durasi hanya acuan hemat credit; durasi final boleh dipotong manual di editor. [TRANSCRIPT DI SINI]
Kunci workflow: Gemini menangani transkrip dan timing; image generator menangani komposisi still image; Google Flow menangani gerak antar-keyframe; editor menangani trim, placement, dan hubungan B-roll dengan talking head.
Jangan meminta image generator membuat frame abstrak lalu berharap Google Flow memperbaiki semuanya. Berikan end frame jelas, objek konsisten, arah gerak eksplisit, kamera locked, dan negative prompt untuk mencegah drift.
Sebelum publish, jalankan visual QA: aspect ratio, subtitle safe area, continuity, object readability, unwanted text, logo accuracy, dan artifact check.
4. Buat start frame Visual Part 1
Start frame Visual 1 memakai blank canvas lama sebagai frame 0. Jangan ekstrak frame pertama dari video hasil render.
Prompt image: start frame Visual 1 · textCreate the START FRAME for Visual Part 1 as a completely blank 9:16 portrait canvas. Use full-frame warm off-white paper color #F8F6EF with extremely subtle fine paper grain only. No objects, no circles, no badges, no logos, no notebook, no arrows, no shapes, no text, no border, no shadows, no vignette, no gradients, no watermark. Flat even lighting. This is the clean first keyframe for compositing and animating real logo assets later.
Start frame Visual 1 — blank canvas yang dipakai sebagai frame awal motion. 5. Buat end frame Visual Part 1
End frame memakai komposisi lama Visual 1. Ambil logo resmi dari `https://obsidian.md/images/obsidian-logo-gradient.svg`, `https://raw.githubusercontent.com/NousResearch/hermes-agent/main/website/static/img/logo.png`, dan asset OpenClaw dari repository resminya. Download dengan `curl -L --fail -o logo.svg <URL>`, rasterize SVG memakai `sips -s format png logo.svg --out logo.png` bila perlu, lalu composite ke badge kosong memakai layer image editor/FFmpeg. Jangan minta generator menggambar ulang logo: gunakan file logo asli sebagai layer deterministic, lalu export end frame PNG. Logo tidak digambar ulang oleh generator.
Prompt image: end frame Visual 1 · textCreate the END FRAME for Visual Part 1, the opening beat `00:00.000–00:03.950`, as a 9:16 vertical editorial paper-collage composition. Use warm off-white paper #F8F6EF, subtle paper grain, flat torn-paper layers, cobalt blue, tomato red, mustard yellow, and dark purple accents, imperfect black ink outlines, and tactile paper shadows. Show two separate circular paper badges: Hermes Agent in the upper-left and OpenClaw in the lower-right, connected through a small dark-purple faceted notebook in the center with hand-drawn black ink arrows. Keep lower 25 percent empty for subtitles and preserve generous safe margins. Use the real Hermes and OpenClaw logo assets supplied separately; do not redraw, stylize, morph, replace, distort, recolor, or hallucinate either logo. No invented words, fake UI, watermark, humans, neon, photorealism, or 3D CGI.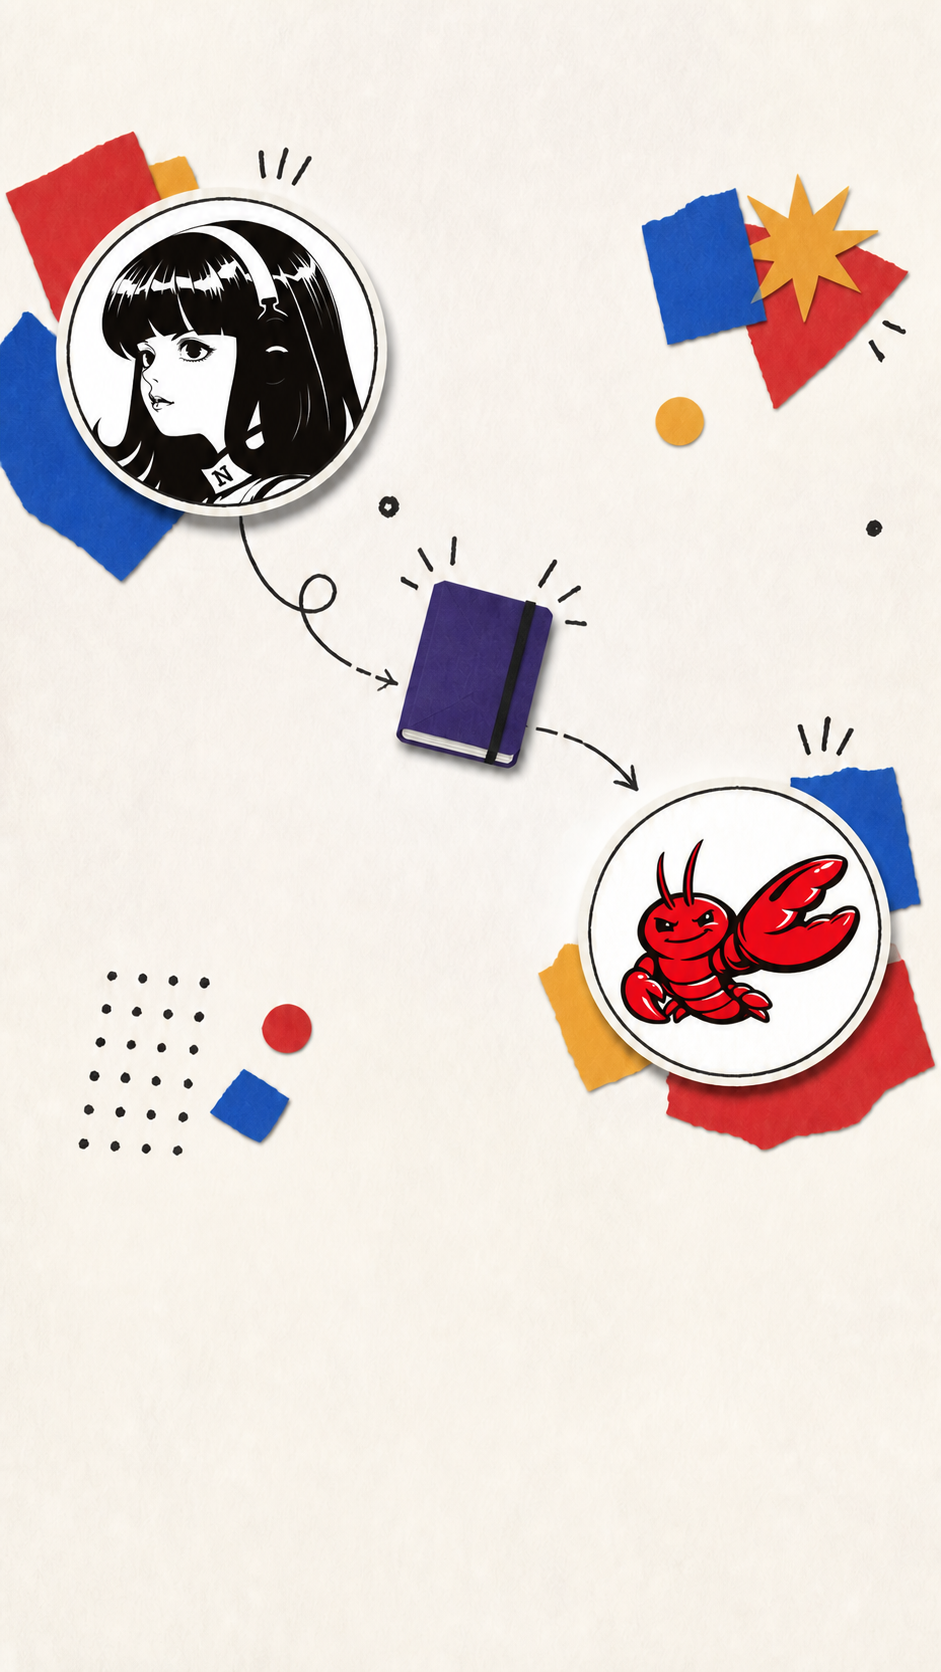
End frame Visual 1 — Hermes dan OpenClaw terhubung melalui notebook pusat. 6. Animate start frame ke end frame di Google Flow
Masukkan start frame dulu, lalu end frame, ke Google Flow. Set model `Omni`, aspect ratio `9:16`, output `720p`, dan gunakan durasi perkiraan dari beat agar credit tidak boros. Setelah generate, pilih `upscale` ke `1080p` saat download. Durasi final tetap bisa dipotong manual di editor.
Prompt Google Flow: Visual 1 start → end · textCreate an approximately 5-second 9:16 vertical editorial paper-collage animation using exactly two keyframes. Upload supplied Keyframe 1 first at frame 0: the completely blank warm off-white paper canvas. Upload supplied Keyframe 2 second at the final frame: the finished Visual 1 end frame. In Google Flow use model Omni, aspect ratio 9:16, output 720p. Animate from blank canvas into the exact supplied end frame: hold blank 0.0–0.7s; bring in the Hermes paper badge 0.7–1.5s; bring in the OpenClaw paper badge 1.4–2.2s; slide the purple notebook into center 2.0–2.8s; draw black ink lines from Hermes to notebook then notebook to OpenClaw 2.7–3.8s; settle all elements 3.8–4.5s; hold exact end frame 4.5–5.0s. Preserve the supplied real logos exactly. No logo redraw, morph, replacement, distortion, recolor, invented text, fake UI, watermark, camera movement, crop, neon, or 3D CGI. Keep lower 25 percent clean for subtitles. No music or voiceover; use subtle paper slide, paper tap, and ink-drawing sounds. After generation, download with `upscale` to 1080p if available.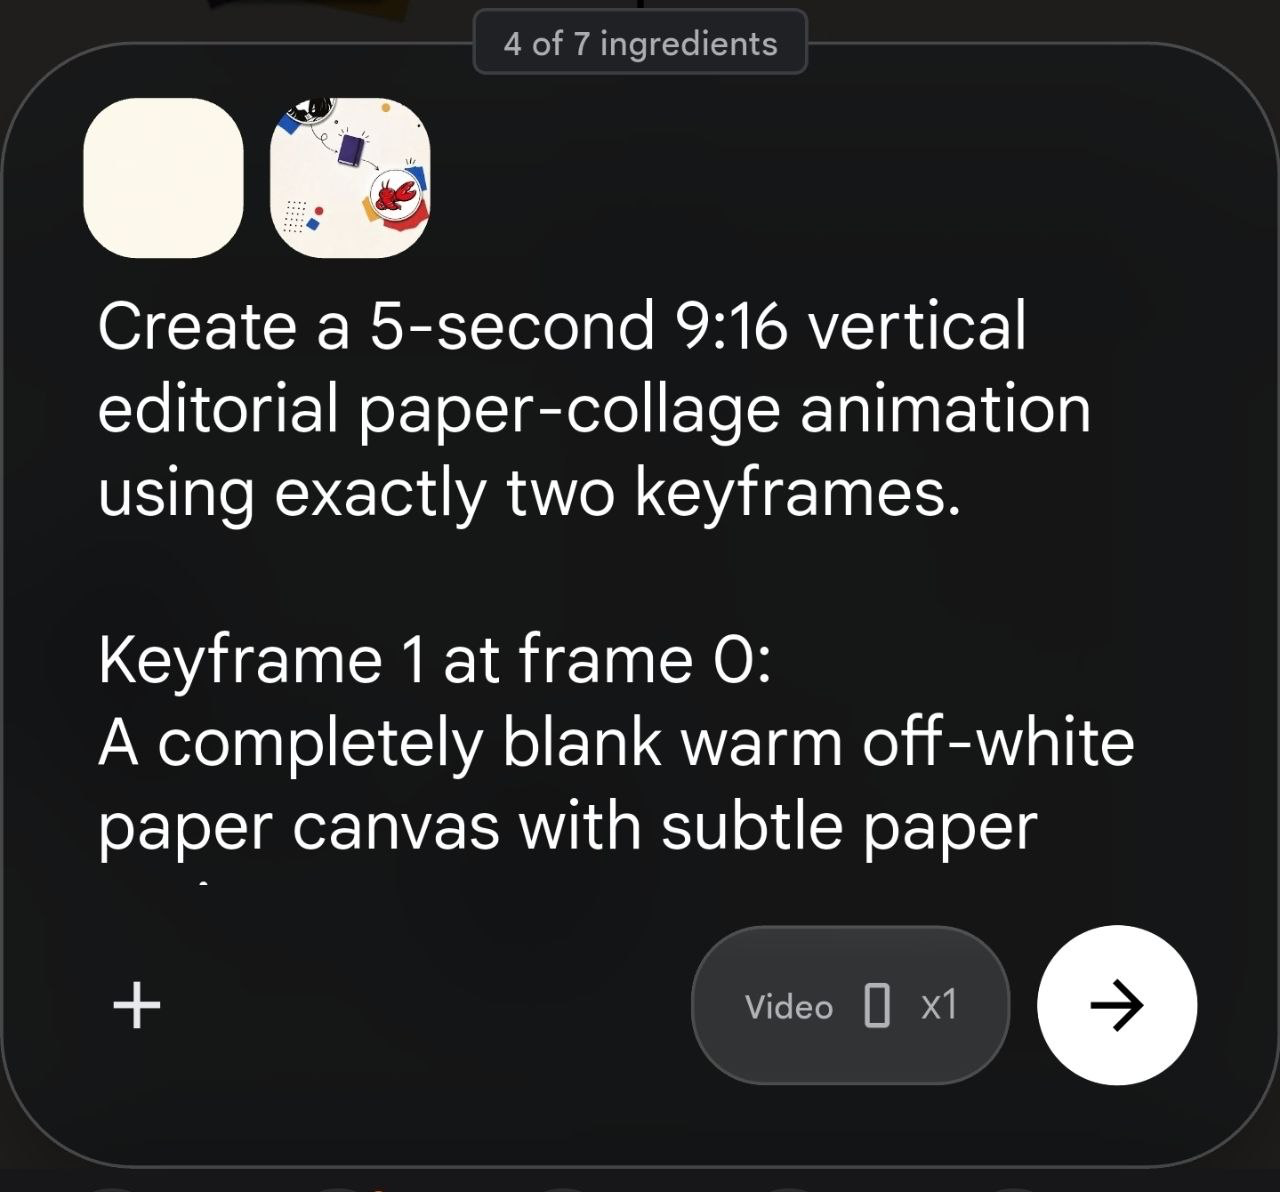
Google Flow — masukkan start frame dan end frame, lalu jalankan prompt motion. 7. Lihat hasil video generated Visual Part 1
Hasil render motion Visual 1 berdurasi sekitar 4 detik. Pakai clip ini sebagai contoh output sebelum masuk tahap trim dan assembly.
Keterangan video: Hasil video generated Visual Part 1 — clip 9:16 berdurasi sekitar 4 detik.
Hasil video generated Visual Part 1 — clip 9:16 berdurasi sekitar 4 detik. 8. Trim dan pasang sebagai B-roll
Edit manual di CapCut. Trim hasil render ke timecode beat `00:00.000–00:03.950`, letakkan di atas talking head, lalu cek subtitle safe area, logo readability, continuity, dan artifact.
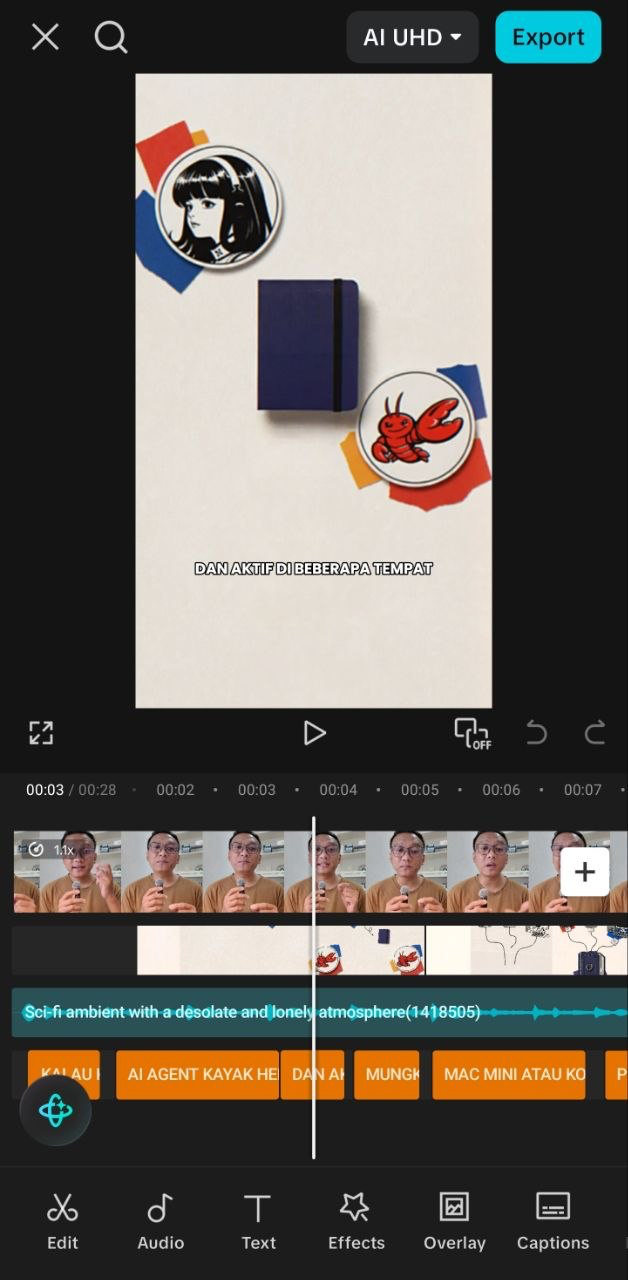
CapCut — pasang B-roll di atas talking head, sinkronkan dengan timecode, lalu cek subtitle dan audio track. 9. Ulangi workflow untuk semua visual tersisa
Visual 1 menjadi template kerja. Untuk setiap beat berikutnya, pakai timecode sebagai perkiraan durasi supaya credit Google hemat. Pilih sendiri apakah beat perlu continuity dari visual sebelumnya atau menjadi scene independent. Buat still image sebagai end frame, buat atau pilih start frame yang sesuai, lalu render, trim manual, dan QA. Jangan copy komposisi Visual 1 mentah-mentah; copy struktur proses dan style saja.
Prompt repeat workflow: semua visual tersisa · textRepeat the Visual 1 workflow for each remaining visual beat. Use the beat timecode and approximate duration from the storyboard as a credit-saving guide; trim final duration manually in the editor. For each beat, define one clear visual idea, required objects, motion direction, start frame, and end frame. Generate the still image as the end frame first. Use the previous beat’s approved end frame as the next start frame whenever continuity is intended; otherwise create a new blank or establishing start frame and state why. If a real brand logo appears, download the official asset from its source URL, rasterize SVG with `sips` when needed, composite the original logo deterministically into the end frame, and never ask the image or video generator to redraw it. Send exactly two keyframes to Google Flow, set the end keyframe at the final frame, render longer than the target if a hold is needed, then trim to the original timecode. Verify 9:16 framing, subtitle-safe lower 20–25 percent, object continuity, motion direction, logo fidelity, no invented text, no warping, and clean final hold. If QA fails, mark REVISE and do not use the clip.10. Lihat hasil final setelah semua B-roll digabung
Setelah semua motion B-roll selesai di-trim, gabungkan seluruh clip dengan video talking head, subtitle, dan audio di editor. Video Instagram ini adalah hasil final gabungan, bukan hasil motion Visual Part 1 saja.
Hasil final video — talking head, seluruh B-roll, subtitle, dan audio sudah digabung lalu di-upload ke Instagram. Buka di Instagram